Installation of Fathom 14, Arrow 11, Impulse 11, or xStream 4
Overview
Warning: These are unsupported legacy versions which have been sunset. These installation instructions are provided as a courtesy and reference for legacy license users.
Fathom, Arrow, Impulse, and xStream can be installed on an unlimited number of user machines, but the number of concurrent users is dictated by the number of seats which were purchased on the license. Add-on Modules like GSC, XTS, and SSL are already bundled with the application and are turned on/off from the software interface with a valid license. The Chempak Database add-on is bundled with the normal software installation starting in releases on or after 2025.08.22; however, it still requires a valid Chempak license to activate.
Full installation setup consists of the following steps:
Use the appropriate resource for your use case:
-
Standard Install - For individual engineers with appropriate permissions to install on your work computer.
-
Silent Install - For IT Admins doing mass-deployment for enterprises using software centers, Microsoft Intune, SCCM, RMM tools, etc.
Requirements
-
Administrator Privileges - The application installation will require admin rights on the PC. Silent install scripts must be executed as admin or by the SYSTEM account.
-
License Number - This is a 9 or 10-digit number provided on the receipt of purchase in the format of XXXXX-XXXXX (the hyphen is part of the license number). Note: The License Numbers are product-specific and version-specific. For example, a Fathom 14 installer will reject a Fathom 13 License Number. Make sure you have the correct License Number from the software purchase/renewal receipt that applies to the product and version that is being installed.
-
32-digit eLicense Activation Code (or Registration.txt file) - The master licensing key from your purchase receipt which controls access to your products. Alternatively, if you have a Registration.txt file this may contain the key inside. If you are using a legacy USB hardware key then this does not apply and you will need to reference the USB Key Driver installation.
-
Internet Connection - The PC must have access to https://my.nalpeiron.com (IP address 20.237.110.18, on port 443) when trying to access the cloud-based eLicense to check out a seat. Ensure it is not blocked by company firewalls.
Standard Install
-
Download the installer from the Customer Portal.
-
Right-click on the installer and select Run as administrator.

-
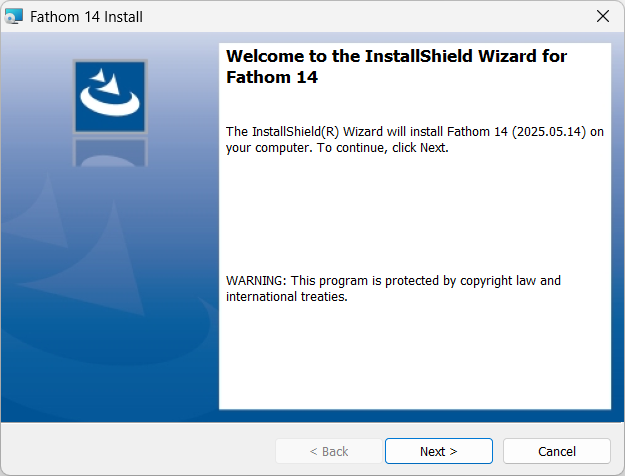
Click Next to begin the installation. This welcome screen displays the Maintenance Release Date in the format YYYY.MM.DD.
-
Read and accept the License Agreement.

-
Enter your Customer Information and License Number. Note: The License Numbers are product-specific and version-specific. For example, a Fathom 14 installer will reject a Fathom 13 License Number. Make sure you have the correct License Number from the software purchase receipt that applies to the product and version that is being installed.

-
Select Local Install (Recommended).

-
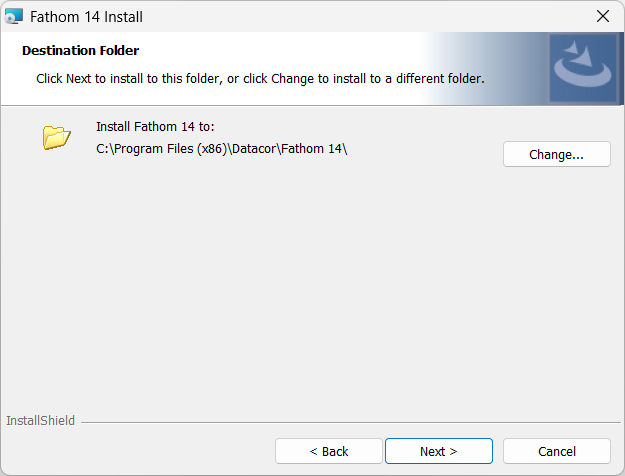
Click Next to accept the default install directory. Changing the install directory is not recommended and may require additional configuration.
-
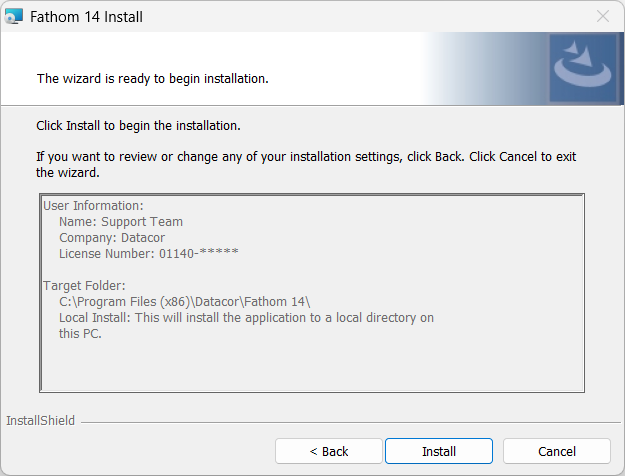
Review the queued installation tasks and click Install.
-
Click Yes on any Windows User Account Control (UAC) pop-ups to acknowledge the changes to the PC. The UAC confirmations are related to the installer checking for the following components which will be installed on the PC if they are not already present:
-
Microsoft Visual C++ Redistributable Packages (x86 for 2015 and 2010 SP1)
-
Microsoft .NET 8.0 Desktop Runtime (x64)
-
-
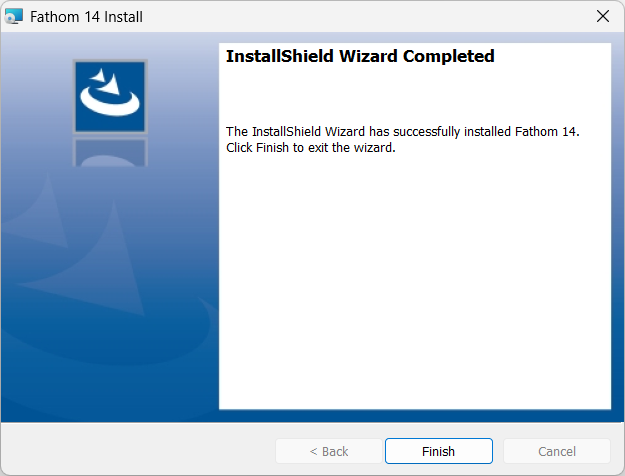
Click Finish.
Activating the eLicense
If you have previously used an eLicense on the PC from an older version of the application, then no further action would be needed. The Registration.txt file containing the eLicense Activation Code will be automatically copied from the old location to the new location upon trying to launch the application for the first time. If this is a fresh install, then you may receive the activation window depicted below.
First Time Setup for Typical User:
-
Launch the application.
-
Enter your 32-digit alphanumeric eLicense Activation Code into the window when prompted. This code is provided on the software purchase receipt. Or, if you have a past Registration.txt file in your records, the code may be found inside.

If you receive the above activation window but use a Legacy USB Key, then it means there was an issue with the USB. In this case, click 'I Have a USB Key Instead' which will open the USB Key Diagnostics window. From there, cross reference the error message with those listed on the USB Key Guide.
-
Click 'Activate'. This will write the Registration.txt file to the appropriate directory (C:\Users\username\AppData\Roaming\Datacor\Licensing). A confirmation message will appear upon success.
-
Afterwards, the application will automatically launch. If there are any issues with the eLicense then a License Error may appear. If that is the case, then select the option to 'View additional eLicense information' and cross reference the error message with those listed on our eLicense Guide.
IT Admin Manual Setup:
-
Create a new text file named "Registration.txt". If the file is misspelled it won't work.
-
Paste the 32-digit eLicense Activation Code inside on line 1 and save. This code can be found on the software purchase receipt.
-
Place the Registration.txt file into C:\ProgramData\Datacor\Licensing. The ProgramData\Datacor directory will exist from running the installer, but the "Licensing" folder will need to be created.
-
Note: In order to use the ProgramData\Datacor\Licensing folder, you must be using 2025.08.29 releases or later. Prior releases will not recognize this folder.
-
Note: The actual end destination of the Registration.txt file is C:\Users\username\AppData\Roaming\Datacor\Licensing because the file can have user-specific settings that require write permission. Our applications will automatically copy the file from C:\ProgramData\Datacor\Licensing to user appdata if it sees that it doesn't exist there. This is to reduce the amount of manual scripting that would be required by IT Admins to disseminate this file to all user folders. Furthermore, in the case of shared lab computers with multiple logins, the initial placement in ProgramData is sufficient for all users as our apps will automatically copy it to each user appdata. For legacy support, our applications will also search and attempt to copy the Registration.txt from C:\ProgramData\Applied Flow Technology or the application installation folder (C:\Program Files (x86)\Datacor\Fathom 14) if it is not present in either the appdata or ProgramData\Datacor\Licensing folder.
-
-
Try to launch the application to confirm success.
Silent Install
Applies to releases on or after 2025.06.30 (Fathom 14, Arrow 11, Impulse 11, xStream 4).
Silent installation refers to the capability of Systems Admins to push installations and updates to end-user machines without any user input. Silent installation happens in the background on the PC without any GUI or interface pop-ups. It is useful for mass-deployment of software versions in enterprise environments with hundreds or thousands of engineers who need the software installed. Silent installation commands can be useful for tools such as company software centers, Microsoft Intune, SCCM, RMM tools, Windows Command Prompt, batch files (*.bat), PowerShell scripts, etc. Silent installation involves passing parameters into an *.msi Windows installer file that is embedded within our *.exe installer.
Template Command (replace portions in red)
Fathom14-2026.07.13v14.0.1338-Installer.exe /S /v/qn /v"AGREETOLICENSE=yes" /v"USERNAME=MyUser" /v"COMPANYNAME=MyCompany" /v"SERIALNUM=XXXXX-XXXXX"
The above command is a basic template where certain parameters in red should be replaced with relevant information for your company. For your reference, all available portions of possible silent install commands are detailed below:
-
Fathom14-2026.07.13v14.0.1338-Installer.exe - This is the name of the installer *.exe and should be replaced with the relevant product being installed. For example, the Arrow product would have a different file name such as Arrow11-2026.07.13v11.0.1338-Installer.exe. If you renamed the installer then be sure to use the appropriate file name.
-
/S - This parameter tells the command to install "silently", meaning no GUI or pop-ups will be present.
-
/v/qn - These parameters tell the *.exe installer to pass the silent installation options into the embedded *.msi.
-
v/"AGREETOLICENSE=yes" - Corresponds to the GUI screen where you accept the License Agreement. By setting this parameter to "yes" you are agreeing to the Terms & Conditions in our License Agreement. If "no" is entered, then the product will not be installed.
-
v/"USERNAME=MyUser" - Replace "MyUser" with the desired user name (no space characters), typically the First & Last name of the engineer. In mass-deployment, you can simply enter the same value as the Company Name below.
-
v/"COMPANYNAME=MyCompany" - Replace "MyCompany" with the desired company name (no space characters).
-
v/"SERIALNUM=XXXXX-XXXXX" - Replace "XXXXX-XXXXX" with the nine or ten digit license number for the product being installed.
Note: The License Numbers are product-specific and version-specific. For example, a Fathom 14 installer will reject a Fathom 13 License Number. Make sure you have the correct License Number from the software purchase receipt that applies to the product and version that is being installed.
Scripting the Licensing Setup
The eLicense is set up through a separate file called Registration.txt that is external from the installer. For completeness, you will need to create this file and script the placement in the correct directory. If you don't place this file on each user machine then the users will be prompted with an activation window where they can paste the 32-digit code themselves. For a truly seamless end-user experience you can set up this file ahead of time.
-
Create a new text file named 'Registration.txt'. If the file is misspelled it won't work.
-
Paste the 32-digit eLicense Activation Code inside on line 1 and save. This code can be found on the software purchase receipt.
-
Script the placement of the Registration.txt file into C:\ProgramData\Datacor\Licensing for each machine that needs access. The ProgramData\Datacor directory will exist from running the installer, but the "Licensing" folder will need to be created.
Note: In order to use the ProgramData\Datacor\Licensing folder, you must be using 2025.08.29 releases or later. Prior releases will not recognize this folder.
Note: The actual end destination of the Registration.txt file is C:\Users\username\AppData\Roaming\Datacor\Licensing because the file can have user-specific settings that require write permission. Our applications will automatically copy the file from C:\ProgramData\Datacor\Licensing to user appdata if it sees that it doesn't exist there. This is to reduce the amount of manual scripting that would be required by IT Admins to disseminate this file to all user folders. Furthermore, in the case of shared lab computers with multiple logins, the initial placement in ProgramData is sufficient for all users as our apps will automatically copy it to each user appdata. For legacy support, our applications will also search and attempt to copy the Registration.txt from C:\ProgramData\Applied Flow Technology or the application installation folder (C:\Program Files (x86)\Datacor\Fathom 14) if it is not present in either the appdata or ProgramData\Datacor\Licensing folder.