Library Browser
The first panel of the Library Manager is the Library Browser. Use the Library Browser to create a new library, add an existing library, view contents of an added library, and connect or disconnect libraries to the model.
Adding and Removing Existing Libraries
To work with a library you must first make it available to Impulse. Referring to Figure 1, clicking on the Add Existing Library button will open a standard file dialog box with which you may browse to and select a library. A library may be removed from the list of available libraries by right-clicking on the library and selecting Remove Library from List. A summary of the library contents can be seen in the section on the right when a library, library section, or component is selected in the list of available libraries.
The AFT INTERNAL LIBRARY and the XSTREAM LOCAL USER LIBRARY may not be removed and will always appear in the list of available libraries. External shared libraries will also always appear in the available library list.
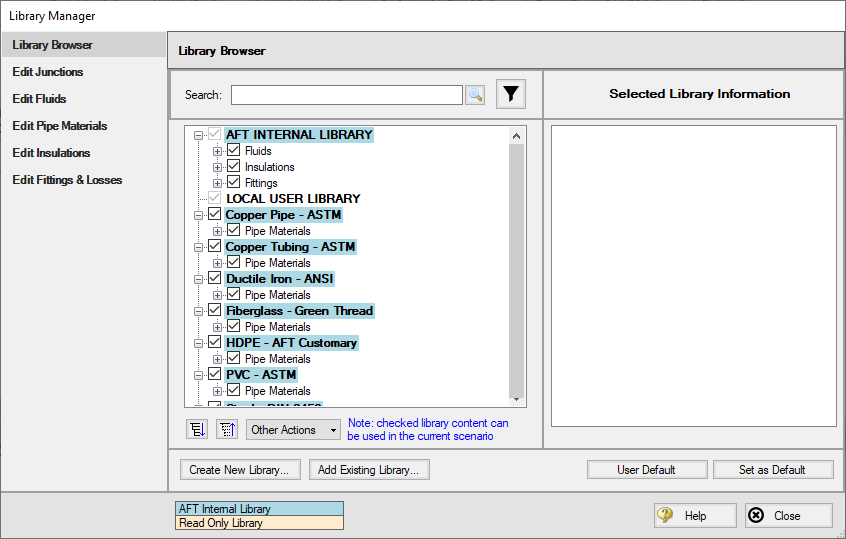
Figure 1: Library Browser in the Library Manager
Connecting and Disconnecting Libraries
In order to use the components from a library in the model the library must be connected. A library is connected to the model when it is shown with a check mark in the Library Browser. All libraries are automatically connected when they are first added to the Library Manager.
Sections or components in a library can also be connected/disconnected on an individual basis if the library as a whole is connected.
Libraries won’t connect successfully if a component in one library has the same name as a component in another connected library. To resolve this issue, rename the components so they have unique names or disconnect the second library prior to connecting the first library.
Connected libraries are saved in the model. Libraries that are not actively used in the model can be safely disconnected without losing any stored information in the library.
Clicking on Set As Default will establish the list of connected libraries as the default list, while clicking on User Default will set the connections to the default list.
AFT Internal Pipe Material libraries can be connected or disconnected as a group from the Other Actions button under the available libraries list.
Editing Library Contents
Existing content can be moved or copied to and from available libraries, or deleted, using the Library Browser.
To edit an item, right-click the item in the Library Browser and select the desired action from the menu. Note that moving, copying, and deleting can be performed on an entire library, a section, or a single component within a library. Individual components can be edited by selecting Edit Component, which navigates directly to the Edit section for the component type.
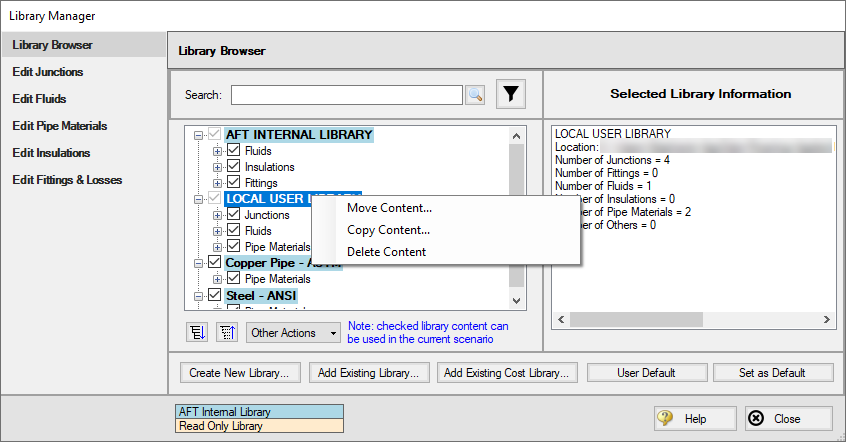
Figure 2: Library contents can be transferred or deleted from the right-click menu
Creating External Libraries
By default library items are stored in the AFT Internal Library or Local User Library, both of which cannot be shared with other users. Library items can be moved or copied to an external library which can be shared with multiple users.
To create an external library click the Create New Library button underneath the available libraries list. You will be prompted to provide a name for the file, and a library description (Figure 3). The provided description will be displayed as the library's name in the Library Manager.
To add content to an external library copy or move content from an existing library as described in the Editing Library Contents section. Junction components can also be directly added to external libraries as is described in the Junction Libraries topic.
For more details on creating and sharing external libraries see Creating an Enterprise-wide Network Library.
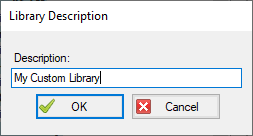
Figure 3: After specifying a library file name, you will be prompted for a description which will then appear in the Library Manager when this library is selected